Dip Powder Instructions: A Comprehensive Guide
Seeking a manicure that boasts vibrant color, lasting power, and minimal nail damage? Dip powder might be your answer! This guide provides detailed instructions for achieving salon-quality results․
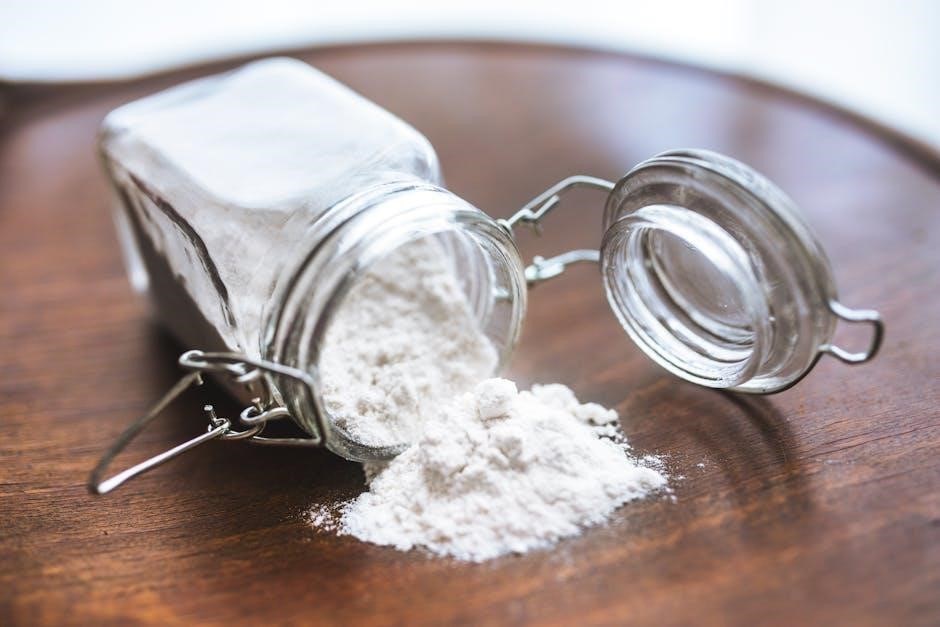
What is Dip Powder?
Dip powder manicures represent a revolutionary approach to nail enhancements, offering a compelling alternative to traditional acrylics and gels․ Unlike these methods, dip powder doesn’t require UV or LED curing, minimizing potential nail damage․ The process involves applying a base coat, then dipping the nail into a finely milled powder, followed by an activator that hardens the layers․
This technique creates a durable, long-lasting, and remarkably natural-looking finish․ The powder itself is a blend of cyanoacrylate (the same adhesive found in super glue, but formulated for nail use) and finely ground acrylic powder․ Multiple dips build color intensity and strength․ It’s a system favored for its simplicity, relatively quick application, and impressive chip resistance․
Essentially, dip powder provides a robust yet flexible coating, delivering a professional-grade manicure experience without the harsh chemicals or lengthy drying times associated with other nail systems․ It’s a fantastic option for those seeking a beautiful, resilient, and healthier manicure solution․
Dip Powder vs․ Gel & Acrylic: A Comparison
When choosing a nail enhancement, understanding the differences between dip powder, gel, and acrylic is crucial․ Acrylics, known for their strength, require mixing liquid monomer with powder, potentially emitting strong odors and causing nail thinning over time․ Gel polish offers a glossy finish but needs UV/LED curing, raising concerns about skin exposure․
Dip powder strikes a balance․ It’s generally considered less damaging than acrylics as it doesn’t require harsh filing or liquid monomer․ Unlike gel, it doesn’t need curing lights, reducing potential risks․ However, dip powder can feel thicker than gel, and improper removal can lead to nail damage – similar to acrylics․
In terms of longevity, all three options can last for several weeks with proper care․ Dip powder excels in chip resistance, while gel offers a more flexible wear․ Ultimately, the best choice depends on your nail health, lifestyle, and desired aesthetic․ Consider these factors carefully!
Benefits of Dip Powder Manicures
Dip powder manicures have surged in popularity, and for good reason! One of the most significant advantages is their exceptional durability․ They are remarkably chip-resistant, lasting up to three to four weeks without significant wear and tear – ideal for busy hands․
Unlike acrylics, dip powder doesn’t require a liquid monomer, minimizing unpleasant odors and potential sensitivities․ The application process is also relatively quick, making it a convenient option for those short on time․ Furthermore, dip powder adds strength to the natural nail, promoting growth and preventing breakage․
The vibrant color options are another draw, offering a wide range of shades to suit any style․ Dip powder provides a fuller, more even coverage than traditional polish․ It’s a fantastic choice for those seeking a long-lasting, beautiful, and relatively healthy nail enhancement!
Potential Drawbacks of Dip Powder
While dip powder offers numerous benefits, it’s essential to be aware of potential drawbacks․ Improper application or removal can lead to nail damage, including thinning or weakening of the natural nail plate․ It’s crucial to seek a skilled technician or follow removal instructions meticulously․
The dipping process, while seemingly hygienic, carries a slight risk of cross-contamination if proper sanitation protocols aren’t followed․ Shared dip powder containers can harbor bacteria, so ensure your salon prioritizes hygiene․ Some individuals may experience allergic reactions to the ingredients in dip powder, resulting in redness or itching․
Removal typically requires more effort than traditional polish, often involving soaking in acetone․ Overexposure to acetone can be drying to the nails and surrounding skin․ Finally, repeated dip powder applications without proper nail care can contribute to long-term nail health issues, so moderation is key․
Preparing for Your Dip Powder Application
Successful dip powder manicures begin with meticulous preparation! Gathering supplies and properly prepping nails are vital steps․ Prioritize cuticle care and shaping for optimal results․
Gathering Your Dip Powder Supplies
Before embarking on your dip powder journey, assembling the correct tools is paramount․ You’ll need a dip powder system – this typically includes a base coat, activator, and top coat, often sold as a kit․ Of course, the dip powder itself is essential; choose your desired color or colors!
Beyond the core system, several other items will significantly enhance your experience․ A nail file and buffer are crucial for shaping and smoothing the nail surface․ Don’t forget cuticle oil and a cuticle pusher to gently prepare the cuticles․ Disposable nail forms or sizing guides are helpful for extensions or achieving a consistent shape․
Lint-free wipes and a dedicated cleanser (often isopropyl alcohol) are vital for removing residue and ensuring proper adhesion․ Brushes for dust removal and precise application are also recommended․ Finally, consider having paper towels readily available for cleanup․ Having everything organized beforehand streamlines the process and contributes to a flawless finish․ A well-stocked kit ensures a smooth and enjoyable dip powder application!
Proper Nail Preparation: The Foundation for Success
Achieving a long-lasting and beautiful dip powder manicure hinges on meticulous nail preparation․ Begin by gently removing any existing polish with a non-acetone remover, as acetone can dehydrate the nail․ Thoroughly wash your hands and nails with soap and water to eliminate oils and debris – this is a critical step!
Next, gently push back your cuticles using a cuticle pusher, avoiding any harsh scraping․ Lightly buff the surface of each nail to remove shine; this creates a slightly rough texture for better adhesion․ Be careful not to over-buff, as this can weaken the nails․ Dehydrate the nail plate using a nail dehydrator or isopropyl alcohol to remove any remaining oils․
Finally, ensure your nails are completely dry before proceeding․ A properly prepared nail surface is the key to preventing lifting and ensuring your dip powder manicure stays flawless for weeks․ Skipping these steps can compromise the entire application, leading to chipping and premature wear․
Cuticle Care & Shaping
Healthy cuticles are paramount for a beautiful and long-lasting dip powder manicure․ Begin by gently softening the cuticles with a cuticle remover or warm water․ Avoid cutting your cuticles, as this can lead to infection and damage the nail matrix․ Instead, focus on gently pushing them back․
Utilize a cuticle pusher – metal or wooden – to carefully push back the cuticles, revealing more of the nail plate․ This creates a cleaner canvas for the dip powder application and prevents lifting․ Pay attention to the sides of the nails, ensuring the cuticles are fully pushed back to avoid product adhering to the skin․
After pushing back, lightly buff any remaining cuticle on the nail plate to further refine the area․ Proper cuticle care not only enhances the appearance of your manicure but also promotes healthy nail growth․ Remember, gentle care is key to maintaining cuticle health and preventing damage․

The Dip Powder Application Process
Now for the fun part! This section details the step-by-step application of dip powder, from base coat to activator, building color and achieving a flawless finish․
Step 1: Applying the Base Coat
The base coat is absolutely crucial for adhesion and protects your natural nail․ Begin with a clean, prepared nail – we’ll cover preparation in detail later, but ensure it’s free of oils and debris․ Apply a thin, even layer of dip powder base coat to all nails, one at a time․ Focus on complete coverage, but avoid flooding the cuticles; this can lead to lifting․

Think of the base coat as the ‘glue’ that allows the dip powder to grip the nail surface․ A quality base coat is essential for a long-lasting manicure․ Work quickly, as the base coat can become tacky as it dries․ If you accidentally get base coat on your skin, carefully clean it up with a small brush or orange wood stick before dipping․
Ensure each nail receives a consistent coat for uniform color and durability․ Don’t be tempted to apply a thick coat, as this can result in an uneven application and potential bubbling․ A thin, even layer is key to success․ Allow a few seconds for the base coat to become slightly tacky before proceeding to the next step – the first dip!
Step 2: The First Dip – Color Application
With the base coat tacky, it’s time to introduce the color! Gently, but swiftly, insert your nail into the dip powder jar at a 45-degree angle; Avoid plunging your entire finger into the powder; this can contaminate the jar․ Instead, lightly tap the powder onto the nail, ensuring full coverage․ Think of it as ‘dusting’ the color onto the surface․
Don’t worry if it doesn’t look perfect on the first try․ The goal is to get an even coating of powder․ Tap off any excess powder immediately after removing your nail from the jar․ A soft brush can help remove stray particles․ Repeat this process for each nail, working one at a time to prevent the base coat from drying․
This initial dip establishes the foundation of your color․ It may appear slightly translucent, and that’s perfectly normal․ Subsequent dips will build the intensity․ Remember to maintain a clean workspace and avoid cross-contamination of colors․ A light first dip allows for better control in building the desired opacity․
Step 3: Subsequent Dips – Building Color Intensity
Now, let’s amplify that color! Repeat the dipping process from Step 2 for each nail, one at a time․ This is where you control the vibrancy and opacity of your manicure․ Each additional dip layers more pigment, resulting in a richer, more saturated hue․ Observe the color build-up with each application; you’ll notice a significant difference․
Typically, two to three dips are sufficient for full coverage, but this depends on the powder’s pigmentation and your desired look․ Don’t rush this stage – even application is key․ Remember to tap off excess powder after each dip and use a soft brush to clean up any stray particles around the cuticles․
Continue dipping until you achieve your preferred color intensity․ Avoid applying too much powder in one go, as this can lead to a bulky or uneven finish․ Patience and controlled application are crucial for a professional-looking dip powder manicure․
Step 4: Activator Application – Polymerization
Time to harden things up! Once you’ve achieved your desired color intensity with multiple dips, it’s time to apply the activator․ This crucial step initiates a chemical process called polymerization, which hardens the dip powder and creates a durable coating․ Apply a generous, even coat of activator to all nails, ensuring complete coverage․
Work quickly, as the activator dries rapidly․ Avoid getting activator on your skin, as it can cause irritation․ If this happens, wipe it off immediately with a damp cloth․ Allow the activator to dry completely – typically around 2-3 minutes – before proceeding to the next step․ You’ll notice the powder becoming noticeably firmer․
A second application of activator is often recommended for optimal hardening and longevity․ This ensures the dip powder is fully polymerized and resistant to chipping and lifting․
Step 5: Filing & Shaping – Refining the Nails
Now for the finesse! After the activator has fully dried, it’s time to refine the shape and smooth out any imperfections․ Using a medium-grit file, gently file the nails to your desired shape – whether that’s square, oval, almond, or coffin․ Be careful not to file down to your natural nail, as this can cause damage․
Pay attention to the sidewalls and cuticle area, ensuring a smooth and even finish․ A nail buffer can be used to smooth out any ridges or bumps, creating a polished look․ Remove any dust created during filing with a soft brush․ This step is vital for achieving a professional-looking manicure․
Don’t rush this process; take your time to perfect the shape and smoothness․ Remember, a well-filed and shaped dip powder manicure looks significantly more polished and lasts longer․
Step 6: Second Activator Application
Almost there! Following filing and shaping, a second coat of activator is crucial for complete polymerization and ensuring the longevity of your dip powder manicure․ Apply a generous, yet even, coat of activator to all ten nails, making sure to cover the entire surface, including the sidewalls and cuticle areas․
This second application fully hardens the dip powder, sealing in the color and creating a durable, chip-resistant finish․ Allow the activator to dry completely – typically around 60-90 seconds – before proceeding to the final step․ Avoid touching your nails during this drying period to prevent any smudging or tackiness․
Proper activator application is key to a long-lasting and flawless dip powder manicure․ It’s the final step in solidifying your beautiful new nails!
Finishing Touches & Aftercare
Seal your stunning dip powder manicure with a glossy top coat! Proper aftercare, including cuticle oil, will extend its life and maintain nail health․
Top Coat Application – Sealing & Shine
The top coat is the crucial final step, providing both a protective shield and a beautiful, lasting shine to your dip powder manicure․ Choose a top coat specifically designed for dip powder systems; regular top coats may not adhere properly or provide sufficient durability․
Apply a thin, even layer of top coat, ensuring you cap the free edge of the nail․ This means gently brushing the top coat over the very tip of the nail to seal it and prevent chipping․ Avoid flooding the cuticles, as this can lead to lifting․
Allow the first coat of top coat to dry completely under a UV/LED lamp, following the manufacturer’s instructions for curing time․ Typically, this is around 60-90 seconds․ A second coat of top coat is often recommended for enhanced shine and protection․ Repeat the application process, ensuring even coverage and proper curing․
Wipe the nails with a lint-free wipe dampened with isopropyl alcohol to remove any sticky residue left by the top coat․ This reveals the brilliant, glossy finish you’ve worked so hard to achieve․ Enjoy your flawlessly finished dip powder manicure!
Dip Powder Removal: Safe Techniques
Removing dip powder requires patience and the right approach to avoid damaging your natural nails․ Never attempt to peel or pry off the dip powder, as this can remove layers of your nail plate, leading to weakness and sensitivity․
The safest method involves filing down the top coat and bulk of the dip powder with a coarse grit file․ Be gentle and avoid filing down to the natural nail․ Next, saturate cotton balls with acetone, place them on each nail, and wrap tightly with foil․
Allow the acetone to sit for 15-20 minutes, softening the remaining dip powder․ Gently push off the softened powder with a cuticle pusher – it should lift easily․ If resistance is met, re-wrap with acetone for a few more minutes․
Buff the nail surface to smooth any remaining residue and hydrate with cuticle oil․ Avoid harsh scrubbing and prioritize gentle removal to maintain nail health․ Remember, proper removal is key to enjoying future dip powder manicures!
Maintaining Your Dip Powder Manicure
To maximize the longevity and beauty of your dip powder manicure, consistent maintenance is crucial․ Regularly apply cuticle oil to hydrate the skin around your nails and prevent lifting․ This simple step significantly extends the life of your manicure and keeps your cuticles healthy․
Avoid using your nails as tools – opening packages or scraping surfaces can lead to chips and breaks․ When doing household chores, consider wearing gloves to protect your manicure from harsh chemicals and physical stress․
If you notice any lifting, resist the urge to pick or pull at the powder․ Instead, gently file down any rough edges to prevent further damage․ A touch-up kit can address minor chips, restoring your manicure’s flawless appearance․
Proper hydration and a balanced diet contribute to overall nail health, supporting the strength and resilience of your dip powder manicure․ Enjoy your long-lasting, beautiful nails!
Troubleshooting Common Dip Powder Issues
Encountering problems with your dip powder application? Don’t worry, many issues are easily resolved! If the powder appears uneven or streaky, ensure you’re dipping at a 45-degree angle and tapping off excess powder before applying․ This prevents clumping and promotes a smooth finish․
Lifting can occur if the nail wasn’t properly prepped․ Thoroughly dehydrate the nail plate and apply a quality base coat․ For bubbles, avoid shaking the activator bottle vigorously; gently roll it instead․
If your nails feel too thick, file them down carefully with a fine-grit file․ Remember to apply activator after filing to reseal the powder․ Allergic reactions are rare, but discontinue use if irritation occurs․
Persistent issues might indicate a faulty product or incorrect application technique․ Review the instructions carefully or consult a professional for guidance․ With practice, you’ll master the art of dip powder!