
Welcome to our guide on creating stunning planter boxes using PDF blueprints! Discover how easy it is to craft durable, stylish planters for your garden or yard․ Perfect for herbs, flowers, or vegetables, these plans ensure precision and success for gardeners of all skill levels․ Start your project today with our step-by-step blueprints and bring your outdoor space to life!
What is a Planter Box?
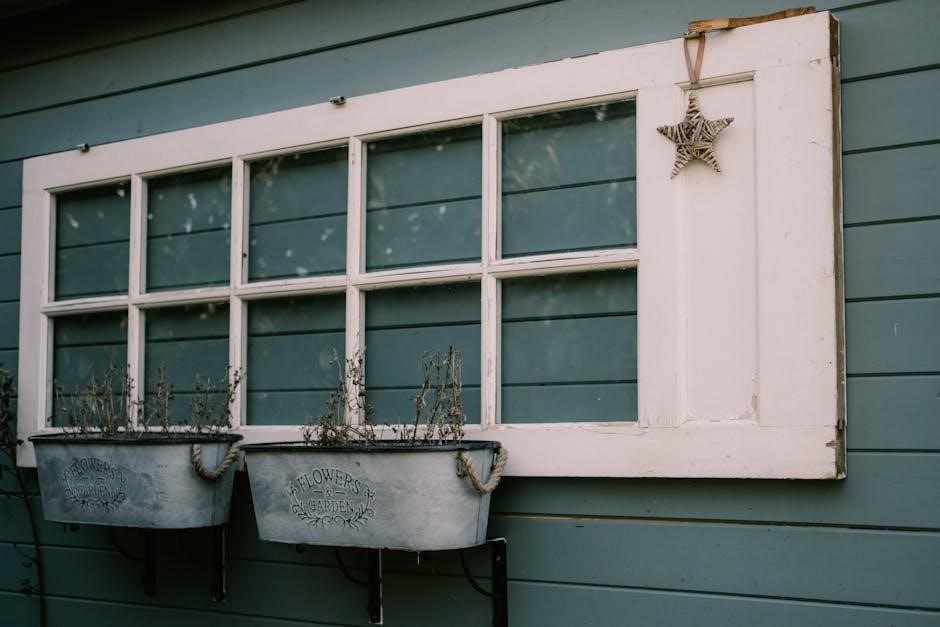
A planter box is a container designed to hold soil and plants, typically made of wood, metal, or plastic․ It is a versatile gardening structure that can be placed on patios, balconies, or yards․ Planter boxes come in various sizes, shapes, and styles, allowing customization to suit different spaces and plant types․ They are ideal for growing herbs, vegetables, or flowers, offering a practical and aesthetic way to enhance outdoor areas․ Their design often includes drainage features to ensure healthy plant growth and longevity․
Why Use Blueprints for Planter Box Plans?
Blueprints provide precise measurements and step-by-step instructions, ensuring your planter box is built to last․ They help you avoid costly mistakes by guiding material selection and construction․ With a blueprint, you can customize the design to fit your space and needs, whether for herbs, flowers, or vegetables․ Blueprints also save time by offering a clear roadmap, reducing trial and error․ They are perfect for DIY enthusiasts of all skill levels, ensuring a professional finish and maximizing your gardening success․
Benefits of Using PDF Plans for Planter Boxes
PDF plans for planter boxes offer unmatched convenience and clarity․ They provide detailed, scalable designs that can be easily printed or viewed digitally․ PDFs ensure precise measurements and instructions, reducing errors and saving time․ They are eco-friendly, eliminating the need for paper blueprints, and can be accessed anywhere․ With customizable options, PDF plans allow you to tailor your project to your space and preferences․ Their visual aids, such as diagrams and layouts, make the building process straightforward, even for beginners, ensuring a professional-quality planter box every time․
Materials and Tools Required
Building a planter box requires durable materials like weather-resistant wood or metal and essential tools such as saws, drills, and sandpaper․ Gather all items before starting for smooth progress․
Common Materials for Planter Boxes
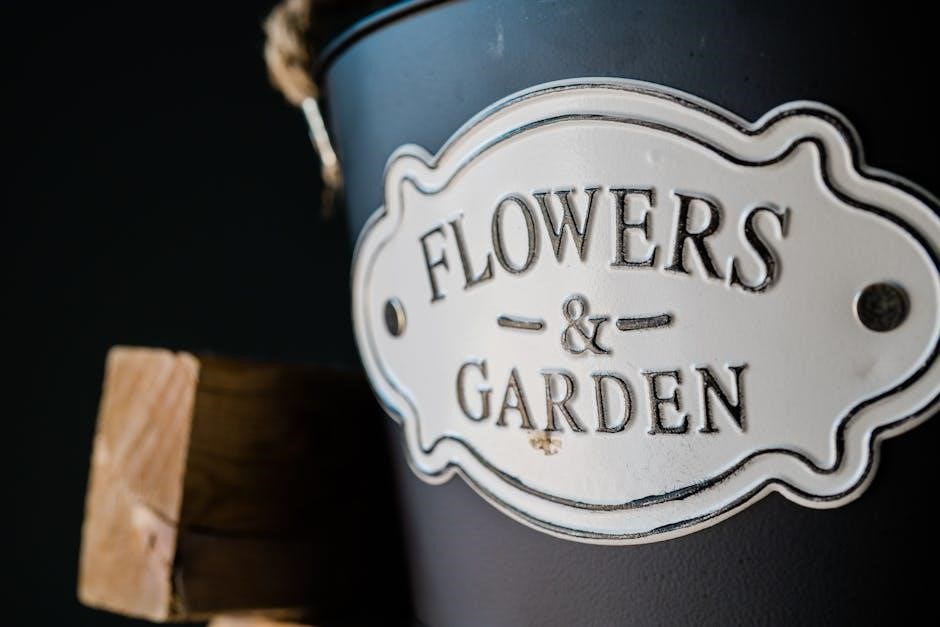
Planter boxes are typically made from durable, weather-resistant materials like cedar, pine, or recycled wood․ Metal, plastic, and composite materials are also popular for their longevity․ Wood offers a natural aesthetic, while metal provides a modern look․ Plastic and composites are low-maintenance and ideal for moist environments․ Bricks and stones can be used for a more permanent structure․ Each material has its benefits, ensuring your planter box withstands outdoor conditions and supports healthy plant growth․ Choose based on durability, cost, and desired appearance․
Essential Tools for Building a Planter Box
To build a planter box, you’ll need basic woodworking tools like a circular saw for cutting wood, a drill press for precise holes, and a sander for smoothing surfaces․ A hammer, tape measure, and screwdrivers are also essential․ For assembling, wood screws and nails are necessary․ Safety gear like gloves and goggles is a must․ Optional tools include a router for decorative edges and a paintbrush for finishing touches․ Having these tools ensures a smooth and efficient building process for your planter box project․
Optional Materials for Customization
Enhance your planter box with optional materials like wheels for portability or storage compartments for tools․ Decorative elements such as paint, metal accents, or carvings can add personal style․ Protective sealants or waterproof coatings ensure longevity․ Incorporate trellises for climbing plants or solar-powered lighting for ambiance․ These additions allow you to tailor your planter box to your garden’s unique needs and aesthetic, making it both functional and visually appealing while following your blueprint planter box plans PDF guide․
Design Considerations
Plan carefully, considering size, material choice, and style to match your space․ Ensure functionality and durability while reflecting your garden’s aesthetic․ Customize to suit your plants’ needs for optimal growth and visual appeal, guided by your blueprint planter box plans PDF․
Choosing the Right Size for Your Planter Box
Selecting the appropriate size for your planter box is crucial for plant growth and functionality․ Consider the space available, the type of plants, and their root depth requirements․ Larger boxes accommodate more soil and plants, while smaller ones are ideal for herbs or compact spaces․ Ensure the size aligns with the intended location, whether it’s for a garden, yard, or indoor use․ Downloadable blueprints often provide precise measurements, helping you determine the perfect dimensions for your needs․ Proper sizing ensures adequate drainage, aeration, and root development for healthy plant growth․
Popular Shapes and Styles for Planter Boxes
Planter boxes come in various shapes and styles to suit different gardens and aesthetics․ Rectangular and square designs are classic choices, offering ample space for plants․ Circular planters add a modern touch, while hexagonal or octagonal styles provide unique visual appeal․ For smaller spaces, tiered or multi-level planters are ideal, maximizing vertical space․ DIY blueprints often include customizable options, allowing you to create planters that match your garden’s theme, whether rustic, modern, or whimsical․ Consider your space and plant needs when selecting a shape and style for your project;
Designing for Different Purposes (e․g․, herbs, flowers, vegetables)
When designing a planter box, consider the specific needs of your plants․ Herbs require good drainage and accessible spacing, while vegetables need ample depth and support․ Flowers benefit from aesthetics that match their vibrant colors․ Tailor your blueprint to accommodate these differences, ensuring proper drainage, spacing, and sunlight exposure․ PDF plans often include customizable options to suit various plant types, helping you create a thriving garden tailored to your preferences and plant requirements․
Choosing the Right Blueprint
Selecting the right plan ensures your project aligns with your skill level and goals․ Consider factors like space, material preferences, and plant requirements to find the perfect fit․
Factors to Consider When Selecting a Plan
When choosing a plan for your planter box, consider your skill level, available space, and desired features․ Ensure the design matches your garden’s style and functional needs․ Check if the plan includes a materials list and step-by-step instructions․ Customization options, such as adjustable sizes or decorative elements, can enhance your project․ Weather-resistant materials and proper drainage systems are essential for durability․ Selecting a plan with clear measurements and assembly instructions will ensure a smooth building process․ Prioritize plans that align with your budget and long-term garden goals․
How to Evaluate the Difficulty Level of a Blueprint
Evaluating the difficulty of a planter box blueprint involves assessing the tools required, the complexity of cuts and assembly, and any special features․ Check if the plan includes detailed instructions and diagrams․ Consider the number of pieces to assemble and the time estimated for completion․ If the blueprint requires advanced woodworking skills or specialized tools, it may be more challenging․ Match the plan to your skill level to ensure a successful and enjoyable building experience․
Matching the Blueprint to Your Skill Level
Selecting the right blueprint involves assessing your woodworking experience and tool availability․ Beginners should opt for simple designs with minimal cuts and basic tools․ Intermediate users can handle more complex plans with additional features like drainage systems․ Advanced crafters may prefer intricate designs or multi-level planters․ Always choose a blueprint that aligns with your skills to ensure a smooth and enjoyable building process․ This will help you achieve professional-looking results without unnecessary frustration․
Adjusting the Plan to Fit Your Space and Needs
Measure your available space to determine the ideal size and shape of your planter box․ Adjust the blueprint dimensions to fit perfectly into your garden or yard․ Consider the type of plants you’ll grow and their specific needs, such as drainage or depth requirements․ Customize features like height, material type, or added wheels for portability․ Ensure the design complements your outdoor decor while meeting your functional needs․ Tailoring the plan enhances both usability and aesthetic appeal, making your planter box a practical and beautiful addition to your space․
Step-by-Step Guide to Building a Planter Box
Follow detailed PDF blueprints to assemble frames, attach sides, and secure bottoms․ Install drainage systems, sand, and finish with paint or sealants for a polished look․
Preparing the Materials and Tools
Start by gathering all materials from your PDF blueprint, including wood, screws, and weather-resistant finishes․ Collect essential tools like drills, hammers, and tape measures․ Organize everything in a workspace․ Double-check measurements to avoid errors․ Safety gear, such as gloves, is a must․ Ensure all tools are in good condition for smooth construction․ Proper preparation ensures efficiency and accuracy when building your planter box according to the blueprint․
Assembling the Planter Box Frame
Begin by following your PDF blueprint to cut wood according to specified measurements․ Use a drill to create pilot holes for screws․ Assemble the frame by attaching sides and base with weather-resistant screws․ Clamp pieces to ensure proper alignment․ Double-check the frame’s squareness for stability․ Sand edges for smoothness․ This step sets the foundation for a sturdy planter box, so precision is key․ Follow the blueprint closely to ensure a solid structure for your garden or yard․
Adding the Bottom and Sides
Cut the bottom and side panels according to your blueprint measurements․ Attach the bottom panel to the frame using weather-resistant screws․ Ensure proper alignment and secure tightly․ Next, attach the side panels, starting with the front and back, then the ends․ Use clamps to hold pieces in place while screwing․ Double-check alignment to ensure even spacing and a flush fit․ Sand all edges for smoothness․ Properly sealing the bottom and sides will prevent water damage and ensure your planter box remains durable and functional․
Installing Drainage and Irrigation Systems
Begin by drilling drainage holes in the bottom panel to prevent waterlogged soil․ Add a thin layer of gravel or mesh for improved drainage․ For irrigation, install a soaker hose or drip system, ensuring even water distribution․ Connect the system to a water source and test for leaks․ Optionally, integrate an automated timer for convenience․ Proper drainage and irrigation systems ensure healthy plant growth and reduce maintenance efforts, making your planter box both functional and sustainable for years to come․
Finishing Touches (Sanding, Painting, etc․)
Once the planter box is assembled, sand all surfaces to smooth out rough edges and splinters․ Apply a coat of primer or sealant if desired, followed by paint or stain to match your desired aesthetic․ For outdoor use, opt for weather-resistant finishes to protect the wood from moisture and UV damage․ Allow the finish to dry completely before planting․ Adding decorative elements like trim or decals can enhance the design․ These final touches ensure your planter box is both functional and visually appealing, ready to complement your garden or yard․
Installing the Planter Box in Your Garden or Yard
After completing your planter box, choose a suitable location with adequate sunlight and drainage․ Ensure the area is level to maintain stability․ If placing on a patio or deck, use protective pads to prevent scratching․ For in-ground installation, dig a shallow trench and secure the box with stakes․ Add soil and your chosen plants, making sure not to overfill․ Water thoroughly and monitor drainage․ Proper installation ensures your planter box thrives and enhances your outdoor space beautifully for years to come․
Safety Tips and Best Practices
Always wear safety goggles and gloves when cutting or drilling materials․ Keep power tools away from children and ensure proper ventilation when painting or staining wood․
Safety Precautions When Working with Power Tools
Always wear safety goggles and gloves when operating power tools to protect yourself from debris․ Ensure tools are well-maintained and blades are sharp to avoid kickback․ Keep loose clothing tied back and long hair secured․ Maintain a clean workspace to prevent tripping hazards․ Never leave running tools unattended, especially around children․ Use proper ventilation when sanding or painting to avoid inhaling dust or fumes․ Follow the manufacturer’s instructions for tool usage and safety guidelines․ Regularly inspect tools for damage and ensure they are stored safely after use․
Using Weather-Resistant Materials
When building a planter box, using weather-resistant materials is essential to ensure durability and longevity․ Cedar, redwood, and composite materials are excellent choices as they naturally resist rot and insect damage․ For added protection, apply a water-resistant sealant or finish to the wood․ Avoid using untreated pine, as it can warp or decay when exposed to moisture․ Metal and recycled plastic options are also great for withstanding harsh outdoor conditions․ Always follow the manufacturer’s recommendations for finishes to maintain the material’s integrity and appearance․
Ensuring Proper Drainage to Prevent Water Damage
Proper drainage is crucial to prevent water damage and root decay in planter boxes․ Start by adding a layer of gravel at the bottom for better water flow․ Drill 2-3 holes in the base of the box to allow excess water to escape․ For added protection, line the inside with a waterproof material like plastic or a durable liner․ This ensures moisture doesn’t rot the wood and keeps your plants healthy; Regularly inspect and clean the drainage system to maintain optimal conditions for your garden․
Common Mistakes to Avoid
Avoid overlooking proper measurements, using low-quality materials, and not following blueprint instructions closely․ These errors can lead to structural issues and reduce the planter box’s longevity․
Overlooking the Importance of Proper Measurements
One of the most common mistakes when using planter box blueprints is ignoring the importance of accurate measurements․ Incorrect cuts or uneven fits can lead to structural weaknesses, water damage, or poor drainage․ Always double-check your measurements before cutting materials to ensure all pieces align properly․ Using a tape measure and square can help maintain precision․ Rushing this step often results in costly errors, so take your time to verify each dimension carefully․ Proper measurements are the foundation of a successful and durable planter box․
Using Low-Quality Materials
Using low-quality materials is a common mistake that can lead to a planter box that deteriorates quickly or fails to hold up under normal use․ Cheap wood or thin metal may warp, rot, or rust prematurely, compromising the structure and appearance of your planter․ Always opt for durable, weather-resistant materials, such as treated wood or high-quality plastics, to ensure your planter box withstands outdoor conditions and lasts for years․ Investing in superior materials saves time and money in the long run․
Not Following the Blueprint Instructions Closely
One of the most common mistakes when building a planter box is not adhering strictly to the blueprint instructions․ Even small deviations can lead to structural issues, such as uneven sides or a weakened frame․ Misaligned cuts or improper assembly can result in a planter box that doesn’t function as intended․ Always follow the PDF plan step-by-step to ensure accuracy and avoid costly repairs․ Double-check measurements and alignment before proceeding to each stage of the project for a professional-grade finish․
Customization and Functionality
Elevate your planter box with creative features like wheels for portability, storage compartments, or decorative elements․ These additions enhance functionality and aesthetic appeal, making your planter truly unique․
Adding Wheels for Portability
Adding wheels to your planter box enhances its functionality, allowing easy relocation without heavy lifting․ Choose durable materials like metal or heavy-duty plastic for the wheels․ Ensure they are securely attached to the planter’s frame for stability․ Consider the weight capacity of the wheels to support the planter when filled with soil and plants․ This feature is especially useful for gardeners who want to move their plants to different locations for optimal sunlight or seasonal adjustments․ Proper installation ensures smooth mobility and protects your planter from damage․
Incorporating Storage Compartments
Incorporating storage compartments into your planter box adds functionality and organization․ Use the same materials as your planter to create a seamless design․ Add small drawers or shelves for storing gardening tools, seeds, or accessories․ Ensure the compartments are proportionate to the planter’s size and positioned for easy access․ This feature is ideal for maximizing space, especially in smaller gardens or yards․ Properly seal and finish the compartments to protect items from moisture and pests, enhancing both utility and aesthetics for your outdoor space․
Adding Decorative Elements
Add a personal touch to your planter box by incorporating decorative elements․ Carvings, intricate designs, or painted patterns can enhance its visual appeal․ Consider adding metal accents, trellises, or ornamental trim for a unique look․ Use durable, weather-resistant materials like cedar or recycled plastic to ensure longevity․ Personalize the design to match your garden’s style, whether modern, rustic, or cottage-inspired․ Finishing touches like sealing or staining will protect the wood while showcasing the decorative details․ This step transforms your planter box into a stunning garden centerpiece․
Advanced Techniques
Elevate your planter box project with advanced techniques like multi-level designs, hydroponic systems, or self-watering mechanisms; These methods enhance functionality and visual appeal, offering a modern twist to traditional planters․
Building Multi-Level Planter Boxes
Multi-level planter boxes are a great way to maximize space and add visual interest to your garden․ They allow you to grow multiple plants at different heights, creating a layered effect․ When building multi-level planters, ensure each level is sturdy and properly supported․ Use durable materials like wood or metal for the frame and include drainage holes in each tier․ Consider adding a irrigation system to simplify watering․ With proper planning and construction, multi-level planters can enhance both functionality and beauty in your outdoor space․
Integrating Hydroponic Systems
Integrating hydroponic systems into your planter box offers a modern, soilless growing method․ This advanced technique involves circulating a nutrient-rich solution to plant roots, promoting healthy growth․ Hydroponic systems can be incorporated into planter boxes using pumps, reservoirs, and grow mediums like coco coir or clay pebbles․ This setup reduces water waste and increases yields, making it ideal for urban gardens․ With proper planning and maintenance, hydroponic planter boxes can thrive, providing fresh produce year-round․ Ensure your blueprint includes space for the system components and proper drainage․
Creating a Self-Watering Planter Box
A self-watering planter box is an innovative way to ensure plants receive consistent hydration․ By incorporating a built-in water reservoir and a wicking system, plants can draw water as needed․ This design is perfect for busy gardeners or those new to gardening․ The reservoir, often placed at the bottom, is connected to the soil through capillary action or a wicking material․ This system reduces overwatering and minimizes maintenance․ Include a water level indicator in your blueprint for easy monitoring․ This feature is especially useful for urban gardens or patio spaces․
Troubleshooting Common Issues
Address leaks, warping, or drainage problems promptly․ Inspect seals, replace damaged wood, and adjust irrigation systems to ensure your planter box remains functional and durable․
Fixing Leaks in the Planter Box
Identify the source of the leak by inspecting the seams and joints․ Clean the area thoroughly with sandpaper to ensure a smooth surface․ Apply a waterproof sealant or wood glue to the affected area, following the product’s instructions․ Allow the sealant to dry completely before testing with water․ For persistent leaks, consider replacing damaged boards or recaulking the entire planter box to prevent further issues and ensure optimal performance for your plants․
Repairing Damaged Wood or Metal Parts
For damaged wood, sand the area to smooth rough edges․ Apply wood filler or epoxy to cracks or holes, letting it dry fully․ Sand again for an even surface․ If rot is present, replace the affected wood entirely․ For metal parts, remove rust with a wire brush and apply a rust-resistant coating․ If damage is severe, replace the metal component․ Ensure all repairs are weatherproof to maintain durability and prevent further deterioration, keeping your planter box sturdy and long-lasting․
Addressing Warping or Uneven Surfaces
If your planter box has warped or uneven surfaces, start by identifying the cause, such as moisture exposure or uneven drying․ For minor warping, clamp the wood firmly and let it dry completely․ Sand uneven areas to create a smooth surface․ Apply wood sealant or paint to protect the material․ For severe warping, consider replacing the affected planks․ Ensure all surfaces are level before reinstalling․ Proper care and maintenance can prevent future warping, keeping your planter box sturdy and visually appealing․
With the right blueprint, your planter box project will be a success! Enjoy the durability, style, and functionality of your custom planter, perfect for any garden or yard․
Final Tips for Success
For a successful planter box project, carefully review your blueprint and gather all materials beforehand․ Use high-quality, weather-resistant wood to ensure durability․ Always follow the instructions closely to avoid costly mistakes․ Consider adding a protective finish to enhance appearance and longevity․ Proper drainage is essential to prevent water damage․ Don’t hesitate to add personal touches, like paint or decorative elements, to make your planter box unique․ Regular maintenance will keep your planter thriving for years to come!
The Importance of Following a Blueprint
Following a blueprint ensures your planter box project is executed accurately and efficiently․ It provides clear instructions, measurements, and material lists, minimizing errors and saving time․ A well-designed blueprint guides you through each step, helping you avoid costly mistakes․ PDF plans are particularly convenient, as they can be easily downloaded, printed, and referenced repeatedly․ By adhering to the blueprint, you’ll achieve a professional-looking planter box tailored to your space and needs, ensuring durability and functionality for years to come․ Stay organized and confident with a reliable blueprint!
Encouragement to Start Your Planter Box Project
Starting your planter box project is an exciting step toward enhancing your outdoor space! With a clear blueprint and simple materials, you can create a beautiful and functional planter․ Don’t hesitate—begin by gathering your tools and materials, and follow the PDF guide step by step․ Even if you’re new to DIY projects, the detailed instructions will guide you confidently․ Remember, every great garden starts with a small idea․ Take the first step, and enjoy the satisfaction of growing your favorite plants in a planter you built yourself!