Crosley Turntable Instructions: A Comprehensive Guide
Welcome! This guide offers detailed instructions for Crosley turntables, like the Cruiser Deluxe and C100. Customer service is available at 1-888-CROSLEY, and resources can be found online.
Ensure proper setup, operation, and maintenance for optimal performance. Troubleshooting steps are included for common issues, covering both turntable and CD player functionality.
Understanding Your Crosley Turntable
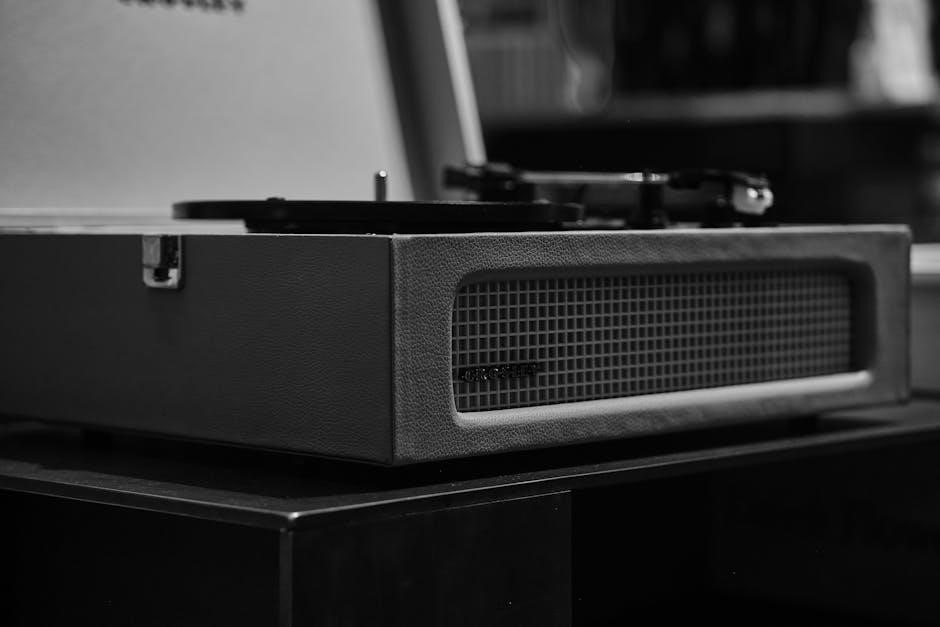
Crosley turntables offer a convenient and stylish way to rediscover your vinyl collection. These turntables are designed for ease of use, making them perfect for both seasoned audiophiles and those new to the world of records. However, understanding the basic components and functions is crucial for optimal performance and longevity.
Many models, such as the popular Cruiser Deluxe and C100, feature a built-in CD player alongside the turntable, offering versatility in your listening experience. The core components include the platter (where the record sits), the tone arm (which holds the needle), and the function switch – a key control for selecting between modes like ‘Phono’ for vinyl playback.
It’s important to recognize that Crosley turntables often prioritize portability and affordability, which can influence sound quality compared to high-end audiophile equipment. Familiarizing yourself with the specific features of your model, referencing the instruction manual (available online at www.crosleyradio.com), and understanding basic turntable operation will greatly enhance your enjoyment. Remember to contact customer service at 1-888-CROSLEY for any questions.
Identifying Crosley Turntable Models (Cruiser Deluxe, C100, etc.)
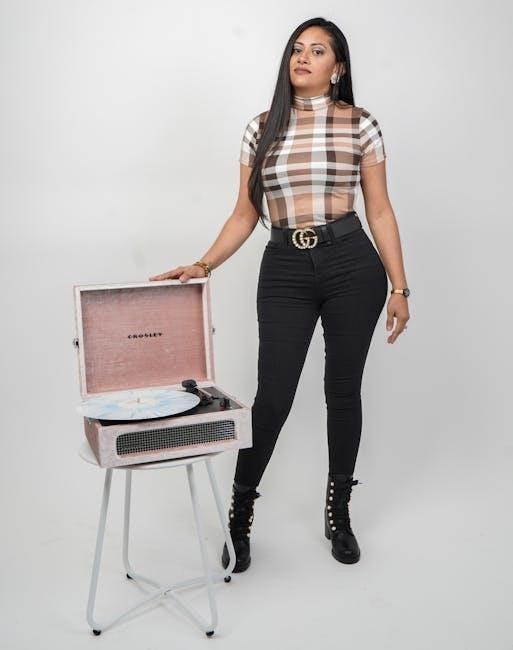
Crosley offers a diverse range of turntables, each with unique features and aesthetics. Identifying your specific model is the first step towards accessing the correct support and instructions. Popular models include the iconic Cruiser Deluxe, known for its portability and vintage-inspired design, and the C100, a more traditional turntable offering a broader feature set.
Other models encompass various styles, from briefcase-style players to more contemporary designs. Key identifiers often include the model name prominently displayed on the unit itself, typically on the underside or rear panel. Checking original packaging or purchase receipts will also confirm your model number.
Once identified, you can access specific instruction manuals and troubleshooting guides on the Crosley Radio website (www.crosleyradio.com). Different models may have variations in setup, operation, and component placement. Knowing your model ensures you’re following the correct procedures for optimal performance and avoiding potential issues. Customer service at 1-888-CROSLEY can also assist with model identification if needed.
Safety Precautions and Initial Setup
Before operating your Crosley turntable, carefully review all safety instructions. Read and understand the entire manual to prevent damage to the unit or potential injury. Ensure the turntable is placed on a stable, level surface, away from direct sunlight, extreme temperatures, and excessive moisture.
Avoid placing the turntable near liquids or sources of dust. Do not attempt to disassemble or repair the unit yourself; contact customer service for assistance. When handling the turntable, always unplug it from the power source. Protect the stylus (needle) from damage – it’s a delicate component crucial for sound quality.
Initial setup involves unpacking all components and inspecting for any shipping damage. Familiarize yourself with the location of controls, including the function switch and tone arm. Keep the packaging materials for potential future transport or warranty claims. For questions or problems, contact Crosley Customer Service at 1-888-CROSLEY before returning the unit to a store.
Setting Up Your Crosley Turntable

Proper setup is key! Connect the turntable to a power source and your audio system. Position it on a level surface, and remove all protective features before use.
Connecting to Power and Audio System
Power Connection: Before operating your Crosley turntable, ensure it’s properly connected to a power outlet. Use the provided AC adapter, verifying the voltage matches your local electrical supply. Incorrect voltage can damage the unit.
Audio Output Options: Crosley turntables offer various audio output options. For modern systems, utilize the RCA output jacks to connect to an amplifier, receiver, or powered speakers. If your system lacks RCA inputs, consider a 3.5mm auxiliary cable adapter.
Built-in Speakers: Many Crosley models feature built-in speakers. While convenient, external speakers generally provide superior sound quality. If using built-in speakers, adjust the volume control on the turntable to a comfortable level.
Grounding: Some turntables include a grounding wire. Connect this wire to the grounding terminal on your amplifier or receiver to minimize hum or noise. Proper grounding significantly improves audio fidelity.
Testing the Connection: After connecting, power on the turntable and your audio system; Select the appropriate input on your receiver or amplifier to ensure the signal is being received correctly.
Positioning the Turntable for Optimal Performance
Stable Surface: To ensure optimal performance and prevent skipping, position your Crosley turntable on a level, stable surface. Avoid placing it on unstable furniture or areas prone to vibrations, such as near speakers.
Leveling: Use a spirit level to verify the turntable is perfectly horizontal. Adjust the feet, if applicable, to achieve a level position. A level surface is crucial for accurate tracking and sound reproduction.
Clearance: Provide adequate clearance around the turntable. Ensure there’s enough space for the tone arm to move freely across the record without obstruction. Avoid placing the turntable too close to walls or other objects.
Isolation: Consider using an isolation platform or mat to further minimize vibrations. These accessories absorb external vibrations, resulting in cleaner, more detailed sound.
Direct Sunlight: Protect the turntable from direct sunlight and extreme temperatures. Prolonged exposure to heat or sunlight can damage the components and affect performance. A cool, dry environment is ideal.
Removing the Needle Cover and Protective Features
Needle Cover Removal: Before playing a record, carefully remove the protective needle cover. This small plastic cover shields the delicate stylus from dust and damage during storage and transport. Gently lift upwards to detach it – avoid forcing it.
Tone Arm Clip: Many Crosley turntables feature a tone arm clip to secure the arm during movement and prevent accidental damage. Before playing, ensure this clip is released, allowing the tone arm to move freely across the record’s grooves.
Transit Screw (if applicable): Some models include a transit screw, designed to immobilize the platter during shipping. Crucially, remove this screw before attempting to operate the turntable. Failure to do so will prevent the platter from spinning.
Protective Film: Check for any protective film applied to the platter or other components. Remove this film carefully to ensure smooth operation and optimal sound quality.
Caution: Handle the stylus with extreme care. It is fragile and can be easily damaged. Avoid touching it directly to prevent contamination or bending.

Operating Your Crosley Turntable
Begin playback by selecting “Phono” on the function switch. Carefully move the tone arm, noting the auto-stop feature. Follow step-by-step instructions for vinyl record enjoyment!
Function Switch: Selecting Phono Mode
The function switch is crucial for proper Crosley turntable operation. It dictates the audio source and signal processing. To play vinyl records, ensure the switch is firmly set to “Phono”. This setting configures the turntable’s internal preamplifier to correctly decode the signal from your records.
If the switch is in the wrong position – such as “AUX” or “CD” – the sound will be distorted, quiet, or non-existent, even if all other connections are correct. Always double-check this setting first when troubleshooting sound issues.
Some Crosley models feature additional settings like “Line In” for connecting external audio sources. However, for standard vinyl playback, “Phono” is the only appropriate selection. Remember to move the switch before lowering the tone arm onto the record. Incorrect settings can potentially damage your vinyl over time, so prioritize correct operation.
Refer to your specific model’s manual for a detailed diagram of the function switch and its various positions. Proper selection guarantees optimal audio fidelity and protects your valuable record collection.
Moving the Tone Arm and Auto-Stop Function
Carefully lifting and moving the tone arm is essential for both playing records and protecting the stylus. Gently unlock the tone arm clip (if present) before maneuvering it. Position the stylus before the start of the desired track, using a steady hand to avoid scratching the vinyl.
Lower the tone arm slowly and precisely onto the record’s surface. Many Crosley turntables feature an auto-stop function. This automatically lifts the tone arm and returns it to its resting position at the end of the record, preventing damage to both the stylus and the vinyl.
To activate the auto-stop, ensure it isn’t disabled by any settings. Some models require a slight movement of the tone arm to the right to trigger the auto-stop mechanism. If the auto-stop isn’t functioning, manually return the tone arm and re-engage the clip.
Avoid forcing the tone arm or applying excessive pressure. Always lock the tone arm clip when not in use to safeguard the delicate stylus from accidental damage during handling or storage.
Playing Vinyl Records: Step-by-Step Instructions
First, ensure your Crosley turntable is correctly set up and connected to a power source and audio system. Confirm the function switch is set to “Phono” mode for vinyl playback. Next, gently place a vinyl record onto the turntable platter. Use a record brush to remove any dust or debris before playing.
Then, unlock the tone arm clip and carefully position the stylus before the desired track. Slowly lower the tone arm onto the record’s surface. The record will begin to spin, and the music will play. Monitor the playback to ensure smooth operation.
When the record finishes, the auto-stop function (if equipped) will lift the tone arm. If not, manually lift and return the tone arm to its resting position, securing it with the clip. Finally, enjoy your vinyl experience! Remember to handle records with care to maintain their quality.
Always avoid touching the stylus directly, as this can damage it. Regular cleaning of both your records and turntable will ensure optimal sound quality and longevity.

Troubleshooting Common Issues
If your turntable isn’t working, verify the function switch is on “Phono.” Move the tone arm right for a click. Ensure the needle cover is removed for proper operation.
For CD issues, confirm correct disc insertion (label side facing down). Contact customer service at 1-888-CROSLEY for assistance.
Turntable Not Working: Basic Checks
Initial Assessment: If your Crosley turntable fails to power on or spin, begin with a series of simple checks. First and foremost, confirm the function switch is correctly positioned to “Phono.” This is a frequently overlooked step, as other settings will disable turntable operation.
Tone Arm Engagement: Gently move the tone arm to the right. You should feel and hear a subtle click as it engages the mechanism. This action is crucial for initiating the spinning process. If no click is detected, carefully inspect the tone arm’s movement for any obstructions.
Protective Cover Removal: Ensure the protective needle cover has been completely removed. The turntable is designed with a safety feature that prevents operation when the cover is in place to protect the stylus.
Power Connection: Double-check the power adapter is securely connected to both the turntable and a functioning electrical outlet. Try a different outlet to rule out any power source issues. If problems persist, contact Crosley customer support at 1-888-CROSLEY for further guidance.
CD Player Not Working: Troubleshooting Steps
CD Insertion Verification: If your Crosley turntable’s CD player isn’t functioning, the first step is to verify the CD is inserted correctly. Ensure the label side is facing upwards, as this is the standard orientation for most CD players. A misaligned CD can prevent proper reading.
Disc Compatibility: Confirm the CD is a standard audio CD. Some CD formats, like CD-R or CD-RW discs, may not be fully compatible with all Crosley models. Attempt playing a commercially manufactured audio CD to test compatibility.
Cleanliness Check: Inspect both the CD and the CD player’s lens for any dust, fingerprints, or debris. Use a soft, lint-free cloth to gently clean the CD’s surface, wiping from the center outwards. Avoid using harsh chemicals.
Power Cycle: Try turning the turntable off and then on again. This simple power cycle can sometimes resolve temporary glitches within the CD player’s system. If issues continue, consult the user manual or contact Crosley customer service at 1-888-CROSLEY.
Sound Quality Issues: Adjusting Settings

Function Switch Confirmation: Ensure the function switch is correctly positioned to “Phono” when playing vinyl records. Selecting the wrong setting will drastically alter the sound output, often resulting in distorted or muffled audio. This is a crucial first step in troubleshooting.
Volume Control: Begin by adjusting the volume knob on your Crosley turntable. Ensure it’s not set too low, but also avoid maxing it out, as this can introduce distortion. Experiment with different volume levels to find the optimal setting.
External Speaker Check: If using external speakers, verify the connections are secure and the speakers are powered on. Test the speakers with another audio source to confirm they are functioning correctly.
Record Condition: The quality of your vinyl records significantly impacts sound. Scratched or dirty records will produce noticeable pops, crackles, and reduced audio fidelity. Clean your records regularly with a suitable record cleaning solution.
Stylus Inspection: A worn or dirty stylus can also degrade sound quality. Regularly inspect and clean the stylus as outlined in the maintenance section.

Maintenance and Care
Preserve your Crosley! Regularly clean the turntable and records to ensure optimal performance. Replace the stylus when needed, and follow storage instructions for longevity.
Proper care extends the life of your turntable and maintains excellent sound quality.
Cleaning Your Turntable and Records
Maintaining pristine sound requires regular cleaning. For the turntable itself, always disconnect the power before beginning. Gently dust the exterior with a soft, dry cloth. Avoid using harsh chemicals or abrasive cleaners, as these can damage the finish. Focus on removing dust from the platter, tone arm, and base.
Record cleaning is equally crucial. Use a specialized record cleaning brush – carbon fiber is ideal – to remove dust and debris before each play. Brush in a circular motion, following the grooves. For deeper cleaning, consider a record cleaning solution and a microfiber cloth. Apply the solution sparingly and wipe gently.
Avoid touching the record surface with your fingers, as oils can attract dust. Store records in their inner sleeves and outer protective sleeves to minimize dust accumulation. A clean turntable and records contribute significantly to improved sound quality and extended lifespan of both your equipment and your vinyl collection.
Regular upkeep is a small investment for a superior listening experience!
Replacing the Needle (Stylus)
The stylus, or needle, is a crucial component and requires periodic replacement. Over time, it wears down, impacting sound quality and potentially damaging your vinyl records. The frequency of replacement depends on usage, but generally, every 500-1000 hours is recommended.
Before replacing, ensure the turntable is off. Gently remove the existing stylus by carefully unclipping or unscrewing it – consult your turntable model’s specific instructions. Handle the new stylus with care, avoiding touching the delicate tip. Align the new stylus correctly with the cartridge and secure it firmly.

Incorrect installation can cause damage. If you’re unsure, seek assistance from a professional. A worn or improperly installed stylus can lead to skipping, distortion, and irreversible damage to your records. Replacing the stylus is a relatively simple process that significantly enhances your listening experience and protects your valuable vinyl collection.
Prioritize stylus health for optimal performance and record preservation!
Long-Term Storage Instructions
Preparing your Crosley turntable for extended storage requires careful attention to prevent damage. Begin by thoroughly cleaning the turntable and all vinyl records, removing dust and debris. Detach the power cord and any audio cables, storing them separately to avoid strain on connections.
Remove the stylus. This is critical, as prolonged pressure on the stylus can degrade it. Store the stylus in its original packaging or a protective case. If possible, return the tone arm to its resting position and secure it with a latch or clip, if available.
Cover the turntable with a dust cover or protective cloth. Store the unit in a cool, dry environment, away from direct sunlight, extreme temperatures, and humidity. Avoid stacking heavy objects on top of the turntable. Periodically check the storage location to ensure conditions remain optimal, preserving your turntable’s functionality for years to come.
Proper storage safeguards your investment and ensures a seamless return to enjoying your vinyl collection!